My Little Bitcoin – simple cryptocurrency implementation on JavaScript with GUI

I was interested in Bitcoin and Blockchain technologies for a while and in theory things look pretty simple yet so powerful. I really admire genius of Satoshi Nakamoto or whoever invented Blockchain based Crypto Currency and eventually I decided to implement my own simple cryptocurrency to study it better, as for me the best way to learn is to do it myself.

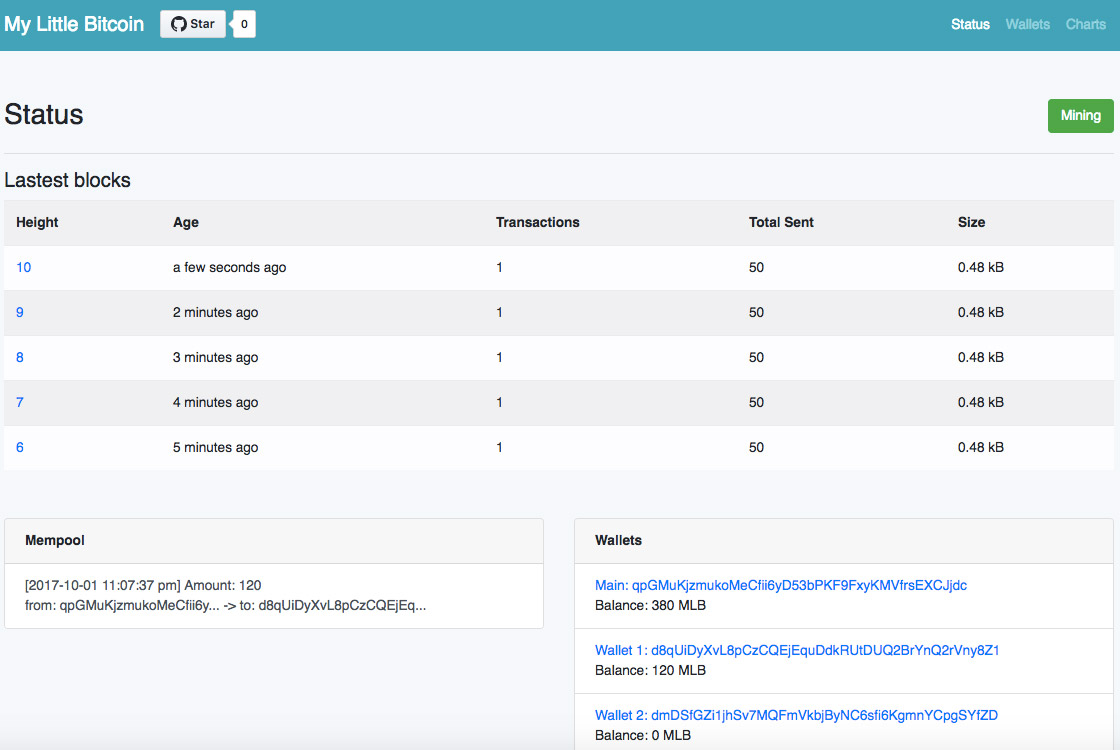
And the result is My Little Bitcoin – a simple cryptocurrency implementation on JavaScript in just about 650 lines of code (without comments and client). It also includes WEB GUI written on Vue.js where you can send coins and explore blockchain.

The structure

The project is based on Node.js and has following basic structure:

  1. Library – consist of functions to help handle crypto currency in a simplest way
  2. Store – this in-memory storage for blockchain, wallets, mempool and few other things
  3. Miner – this a worker that adds new blocks to the chain
  4. Peers – simple peer-to-peer blockchain synchronization implementation
  5. Server – web server that serves data for our front end GUI, includes API and web sockets

The chain

The structure of the chain is the simplest possible.

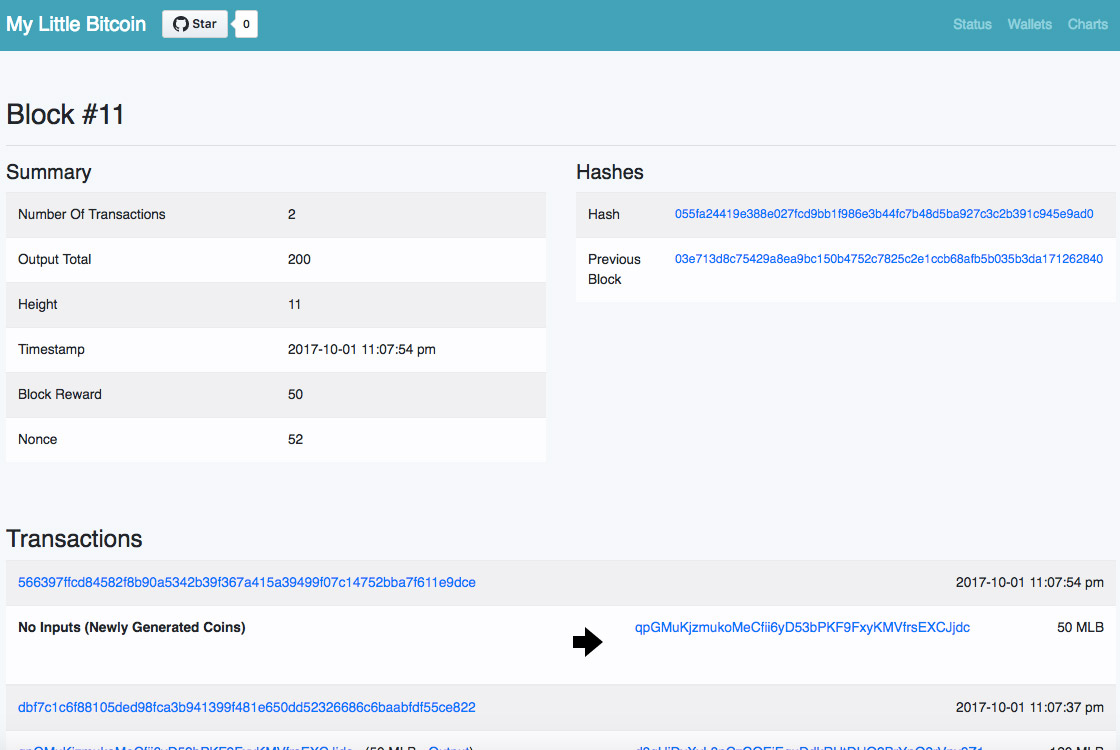
Block structure is following:

{
  index, // Block index
  prevHash, // Hash of the previous block
  time, // Current block timestamp
  transactions, // List of transactions, included into the block
  nonce, // Nonce, required for proof of work protocol
  hash, // Current block hash
}

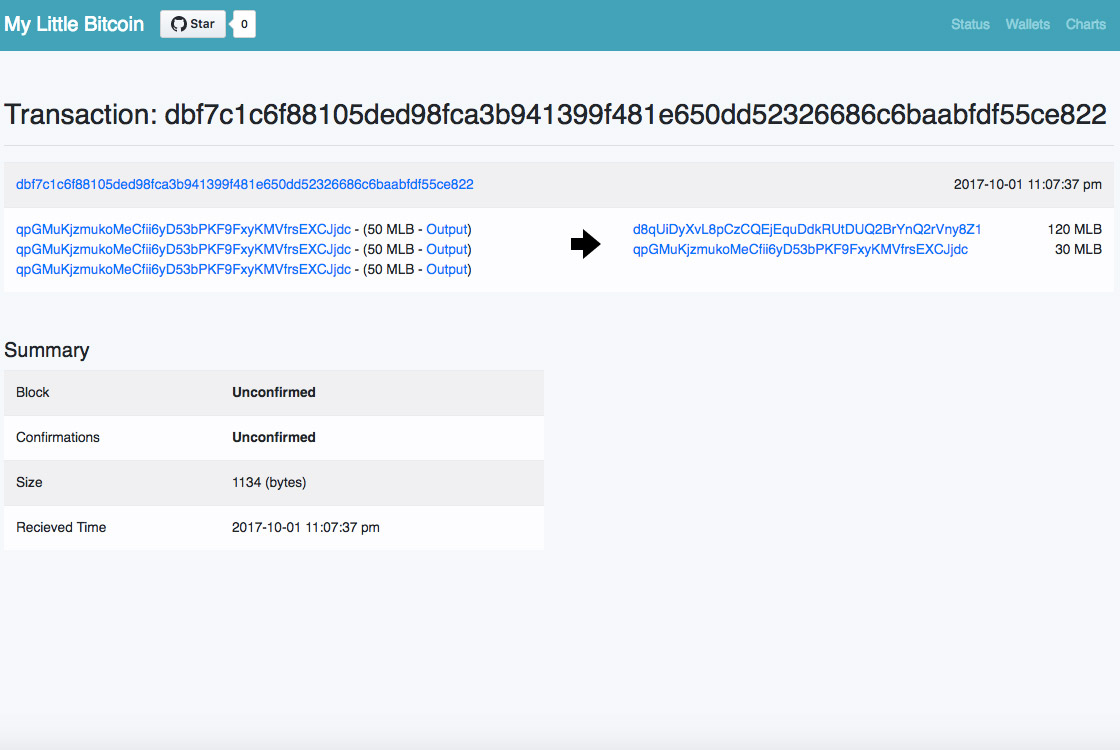
Transaction structure is following:

{
  id, // Transaction unique id
  time, // Transaction timestamp
  hash, // Transaction hash
  reward, // Boolean to mark mining reward transaction
  inputs, // List of inputs in the transaction
  outputs, // List of outputs in transaction
  address, // Transaction is limited to only one input address for simplicity
  hash, // Transaction hash
  signature, // Transaction hash signature
}

And following inputs and outputs structure:

// Input
{
  tx, // Points to transaction of referenced output
  index, // Index of the output in the referenced transaction
  amount, // Amount of the referenced output
  address, // Address of the referenced output and also public key
  signature, // Signature, signed by private key and can be verified by included public key
}
// Output
{
  index, // Output index in current transaction
  amount, // Amount of the output
  address, // Address of the wallet (public key)
}

For demo purpose I created special mode that disables peer-to-peer module, reduces proof of work difficulty and adds one minute block timeout.

Demo

Check sources here: GitHub Link

This implementation is pretty naive and suitable only for studying purpose.

This project is fully free to use for any purpose and licensed under MIT License.

How to setup Node.js production application on Apache multiple virtual host server

When it comes to using Node.js on backend it’s quite different from what people used to do for PHP server configuration.

Process manager

First and most important is not to run your application directly with node app.js command instead use one of the following packages: forever, PM2, and some others. This will help maintain your Node application process and restart it if it crashes.

My own pick is PM2 as it’s the most popular and has lots of features, great app monitoring, easy installations and usage.

Installation is quite simple, just using npm or yarn package managers. You probably will install it globally under root user so it can be accessible for all server users.

[root@theserver ~]$ npm -g install pm2 
# Or
[root@theserver ~]$ yarn global add pm2 

Then switch to the user, your virtual host will be using, let’s call it theproject, and run pm2 startup

[theproject@theserver ~]$ pm2 startup

It will respond with a message like this:
[PM2] Init System found: systemd
[PM2] To setup the Startup Script, copy/paste the following command:

It will require to run command with root privileges, using sudo user or root user directly:

[root@theserver ~]$ <the command from pm2 startup here>

If everything is successful it will add a PM2 service that will run on the system boot under your user theproject. It’s not recommended to install pm2 pm2 startup under the root user directly as it will run all your application scripts under root user as well.

Then you will need to add PM2 process configuration file, it supports json, js, yaml formats, here is the simplest example, process.yaml file:

apps:
  - name: theproject
    script: app.js
    exec_mode: fork

Check more info about process file here.

To run your application, cd to your project folder, and run pm2 start process.yml

[theproject@theserver ~]$ cd theproject
[theproject@theserver theproject]$ pm2 start process.yml

It will start your application and print current status table.

To make sure your app will start again after server restart, run:

[theproject@theserver theproject]$ pm2 save

You can nicely monitor your app using command pm2 monit, check current list of apps pm2 list and view last log records pm2 logs. To get further insights into your app, go to https://keymetrics.io/ setup account and follow instructions, the functionality is really awesome and must have for any production project.

Apache configuration

When our app is up and running on server we actually need to access it somehow using our domain name and 80 port, yet our app is running on some port like 3000 and is available only on 127.0.0.1 (localhost) ip (if not, it might be a security issue).

On 80 port we already have Apache running, so we can use Apache as a reverse proxy for our application. For you you will need to make sure Apache has mod_proxy installed and enabled.

Apache Virtual host configuration will be following:

<VirtualHost *:80>
  ServerName theproject.com
  ServerAlias www.theproject.com
  ErrorLog /home/theproject/logs/error_log
  CustomLog /home/theproject/logs/access_log combined

  ProxyRequests Off
  ProxyPreserveHost On

  ProxyPass / http://localhost:3000/
  ProxyPassReverse / http://localhost:3000/

  # This is needed only if you want to use web sockets
  RewriteEngine On
  RewriteCond %{REQUEST_URI}  ^/socket.io            [NC]
  RewriteCond %{QUERY_STRING} transport=websocket    [NC]
  RewriteRule /(.*)           ws://localhost:3000/$1 [P,L]
</VirtualHost>

After restarting Apache you should be able to successfully access your app using your domain address http://theproject.com.

This configuration also supports socket.io in case you may use web sockets with your application, which is very common with Node apps.